So I got this Elektron Analog Rytm, on my quest to assemble (possibly) an all-analogue setup for making a synth album.
Before I start diving into the feature lineup, and still later into some hands-on experience, I’d like to start with a
Prologue: Why I got it
Hardware drum machines/groove boxes had been almost removed from use ever since my switch to a computer-centric setup late in 2005. As a consequence, both my Roland MC-505 and Quasimidi Sirius have only seen minimal use since then, and incidentally, none of them has seen use as a drum synth.
I got interested in drum synths (not necessarily drum machines, i.e. with a sequencer in it) with my interest in the analogue synth revival. For some time now, you can buy a truly analogue/digital hybrid drum machine for about 150 bucks, namely Korg’s Volca Beats.
On the other end of the price spectrum, Dave Smith had gotten together with Roger Linn to make the Tempest – which costs more than ten times as much as the Volca.
And there’s a lot of things in-between, both analogue and digital. And I’ve looked into most of them, mainly because I was also at a time contemplating on building a analogue-centric hardware-based setup (in which case I would’ve needed a powerful sequencer, but not necessarily in an analogue synth). By MFB, there’s the Tanzbär and Tanzbär Lite, and there was the MFB-522 (all of them fully analogue plus sequencer with a very oldskool look, but the bigger ones offer full MIDI CC control). There’s the highly interesting Vermona DRM1 – a drum synth only, but it does the only thing it does seemingly perfect. There’s even some dedicated bass drum synthesizers by some manufacturers. And of course there’s reverse-engineered 808s, and there’s a lot of digital things – two things worth of mention seem to be Korg’s latest Electribe and Roland’s TR-8.
After some consideration, I found that the sequencer features were not that important to me (read: nearly not important at all, as I inteded to drive the thing with Cubase, anyway), but the analogue sound generation was.
Sound synthesis, for me, always means “flexibility”. And in that context, there’s something I’ve learned when diving into those drum synths
The Difference between Drum and Normal Synthesizers
In those days of analogue glory, you had mono or poly synths – and you had drum synths. You used one for pads, and leads, and basses, and the other for drums.
The reason for that is rather simple: while that typical analogue subtractive synth architecture that most synths share more or less works perfectly well for pads, leads, and basses, it doesn’t work that well for drums. What’s more, an affordable voice architecture that works well for bass drum doesn’t work that well for snare drum, or ride cymbal.
So a drum synth is typically a multitimbral, one-voice-per-timbre synth where the voice architecture for each voice looks different.
Things changed at a certain point, more specifically in the age of Roland’s D-50 family. Suddenly, you got drumkit patches in your synth, which, with just the standard voice architecture of that synth, gave you bass drums, cymbals, timbales, and a lot more.
The reason for that is that the D-50 was one of the first synths (and the first one sold in large quantities) which used samples for waveforms. As memory was expensive back then and address spaces were measured in kB, not TB, you used samples only for the transient beginning of your sounds on those so-called Linear Arithmetic synths, but suddenly, your main synth had become a jack-of-all-trades that could also do drums.
PCM-based oscillators (or vulgo: “samples”) had been the mainstay of drum sound synthesis ever since, until…well, until the 808 craze started in 90s electronic music, and even more so today with those new designs. Such as the Volca Beats. Or the Tanzbär. Or the Tempest. Or the very Analog Rytm.
Why the Analog Rytm then?
There were a few hard and a few soft requirements on my list, and also some non-requirements. Among the hard ones was a fully analogue signal path, MIDI control of sound parameters, and individuals outs. And in a more imprecise, but still hard, form, a flexible sound engine. A soft requirements was the use of samples in combination with the analogue stuff. Non-requirements, as mentioned before, was everything related to the sequencer or to drum pads. I’d use my computer and its existing controllers for that.
In the end, I could remove everything from the population safe for the Tanzbär, the Analog Rytm and the Tempest.
Of those, the Analog Rytm was the only one that met the sample-use requirement. True, the Tempest also has a sample playback feature, but is limited here to its factory content (at least for now, and even if that changes, it doesn’t have the storage capacity for a beautiful temple gong sample). All of them meet the precise requirements. As for flexibility of the sound engine…
On one end of the spectrum, you get the Tanzbär, which is oldskool-style: a different voice architecture for each part, and each one sounds good. On the other side, there’s the Tempest, which is, if you will, a six-voice multitmbral polsynth similar to DSI’s Evolver, with a drum machine built around it. So this one would assumedly be good for everything, but maybe not great for anything. In between is the Analog Rytm. With a choice of voice architectures for each sound – plus, you get the samples.
I decided to get this one.
So what is it, really
The Sound Engine
As the flexibility of the sound engine was one of my important requirements, let’s first have a look at this, mainly because this is a little tricky.
There’s eight voices and twelve parts – so that would make it 12-fold multitimbral, 8-voice polyphonic. The twelve parts are bass drum, snare drum, rim shot, clap, bass/low/mid/high tom, close/open hihat, cymbal and cowbell – all in all, your standards for a drum machine.
So how do the eight voices relate to those parts? Open/closed hihat, cymbal/cowbell, hi/mid tom and rimshot/clap each share a voice, while the remaining four parts have a voice each. This means that you can be sure that e.g. your bass or snare drum will always decay in full (unless they’re retriggered) and not be cut off by a cowbell. On the other hand, it means that your cymbal will always be cut off by a cowbell.Not the most flexible of options, but one that works in an easy-to-understand fashion.
A diagram of the voice shows us how it looks.

You can see that there’s a fully analogue chain from your percussion sound generator to the mixer/individual out (and also through the mixer). Interestingly, the overdrive circuit (yes, one per voice) comes before the filter. The filter is a two-pole multimode design (which means that you will not get it to sound like the staple 18dB/Oct designs) with an ADSR envelope. With the exception of the bandstop, all filters can also be used in a parallel in-line configuration, giving you 1st-order LP/HP characteristics and a peak filter. Sadly, the Amp Envelope is only an AHD design (with the option to add a full level sustain phase for sustained sounds) – I would have preferred a full-blown ADSR one (with or without hold) here.
The sample playback engine is “nothing out of the ordinary” – pick a sample, set tuning, pick start and end and loop points, and you’re good. No option for multi-samples here; this one is really your simple implementation, and should be seen as an add-on, not as something to compete with a MPC or even an Electribe.
Now let’s look at the Percussion Sound Generator, because that’s why I (and I guess most people) got this thing:
The Percussion Sound Generator offers several architectures that are assigned to each part, called Machines. As of software version 1.30C (this improved greatly from v1.20), there’s a total of 27 of them.
So those eight voices are not identical hardware-wise, and you get single-osc designs for the tom parts, multi-oscillator designs for the cymbals and cowbell, and dual-oscillator designs for BD/SD, and an enhanced version of that for rimshot/clap.
It also means that this assignment of actual sounds to the parts has not to be seen that strictly – as an example, you could have four parts (three voices) with bassdrum sounds and four parts (two voices) with closed hihat sounds.
How it actually sounds has to wait until later, when we have a look at the Hands-On-Experience.
Package
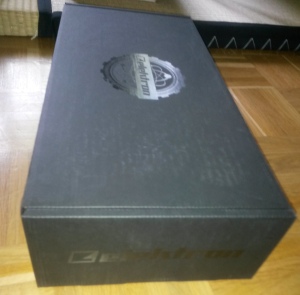
Even before you have the device in your hands, you notice that the user experience has been done with attention to detail: once you pull out the box from its sleeve, you find a high-quality dark coal-coloured box with the company logo and name engraved on the side and top. Inside, you find the device, its power supply (with cables on both sides, so no wallwart affair), the quickstart manual, a license for Ableton Live 9 Lite, and an USB cable.

The device itself, housed in a sturdy black sheet metal casing, is a cuboid thing, so it does not take the slanted desktop case approach of many contemporary devices. While this may be considered a disadvantage if your playing this sitting in front of a table, this is turned into an advantage if you’re standing, like in a typical live situation. For me, this is sitting in a keyboard stand, so it works perfectly well for me. With a width of 34cm, it is in the same ballpark as its direct competitors.

All in all, a nice affair.
The User Interface
As drum machines go, there have been two general approaches with regard to the main components of the user interface:
One approach is to center the attention around a 16-step sequencer, and use one button for each step, putting sixteen buttons in a row (aka the highly accraimed Roland step chicken sauce).
This approach, which puts some of those buttons to a secondary use as drum triggers, has been firmly established by the Roland TR series, and lives on in many designs ever since – from the contemporaries, also in the Volca and Tanzbär.
The other approach is to focus more on playing than on programming, giving the user drum pads, typically in a 4×4 matrix format, made famous by Akai’s MPC series.
Is that really an either-or choice? There’s different approaches to combine them: DSI’s Tempest (obviously with deep input from Roger Linn) has multi-color backlit pads in a 2×8 arrangement, and uses them for both roles – as controllers for playing and for programming.
The Analog Rytm takes another approach altogether: there’s a row of 16 buttons (called “trig buttons”) with LEDs on top spanning the bottom of the device, and the left part of the panel holds 12 (for the 12 parts) velocity- and pressure-sensitive pads with multi-colour backlights for your playing (and also part-selecting) duties.
Before we start celebrating this best of both worlds approach, note that with a size of ca. 1cm, the Analog Rytm’s pads are considerably smaller than those on an MPC, which means that playing typical pianist-style ornaments on one pad is out of the question – and I share the opinion of many a reviewer here on the net that they don’t feel as good as those on a MPC (which reportedly those on the Tempest do).
The left part of the panel is completed by a hardwired master volume knob and some function selection buttons. Continuing to the center section, there’s a soft data-entry knob (named “level” as its default function is controlling the currently selected part’s level), bank select and cursor buttons, and on the top a graphic backlit LCD display.
On to the right, you have eight rotary encoders for controlling up to eight parameters shown in the display, as well as the buttons for menu selection, and below that, play/stop/record transport controls.
Inputs, Outputs, and Mixer Section
Jumping back from buttons and knobs to signal flows, let’s first look at the inputs and outputs:
For outputs, you get a main L/R and a headphones out (all audio in/outs 1/4”). Sadly, no separate volume knob for the headphones is available. There’s a stereo in (on one jack), and a total of eight invididual outs spread across four jacks (which means you need Y cables – I don’t like that). Those individual outs are hardwired to the voices, meaning e.g. cymbal and cowbell share on output.
I already mentioned that the signal path in the mixer section continues to be analogue: Collecting all drum voices, there’s first a stereo mixer. After a first effect return input, you have distortion, the external input, compressor, and another effects return.

There’s two (stereo) send effects, reverb and delay, which are bread-and-butter affairs: meaning they’re mostly there to give you those two very important effects embedded in this box, but I’d assume you’d use external effects in any more serious application. Each one has a non-standard gimmick, though: for the delay, it’s a tape echo behaviour when changing delay time, for the reverb it’s a hold option.
The compressor, at first sight, is a rather complete affair: it even offers parallel mode and a sidechain EQ. Ratio is a choice from 1:2, 1:4, 1:8 and MAX (whatever the latter means), which might be considered a limitation, as the range between ratios of 2 and 4 allow for some very important changes in character. What’s more limiting in my opinion is that the attack time only goes up to 30ms, while the shortest release is 100ms. Considering that, you have a hard time getting in that intended pumping which you tend to reach with release times below 50ms and attack times which go up to 50ms. There’s no single possible time setting with attack=release!
Leaving those limitations aside, it’s good to get a compressor in the first place, and the feature of parallel compression can really help you to still obtain a high flexibility of usable drum submixes.
The distortion circuit is, to me, the most powerful effect in the Analog Rytm’s arsenal. Offering only “amount” and “symmetry” as parameters, you get what you’d typically like for a drum bus distortion circuit, especially if you consider that every voice has already its own overdrive. It sounds good, both at extreme and subtle settings, especially so at the subtle ones. Nice!
Integration – and the digital workflow
Apart from the audio ins and outs, the Analog Rytm of course offers digital signal connectivity: three MIDI connectors (one input, and two usable either as MIDI Out/Thru or for DIN24/48 sync), and an USB2.0 connector.
By already supplying a USB cable with the Analog Rytm, Elektron already made a very clear statement: you need a computer to fully enjoy this thing! This also means that the only way to transfer samples into the (1GB) storage on the Analog Rytm is via a dedicated program by Elektron – which is available for Windows and Mac, which is bad for the Linux crowd.
It’s interesting to see that Elektron opted for an internal sample storage, rather than using a SD card slot like many competitors do. While, at this point, I cannot see myself exceeding that 1GB storage limit, this is in my opinion a completely unnecessary limitation.
In addition to using the USB connection for MIDI-over-USB, sample transfer and software updates, there’s also what Elektron calls “Overbridge”: similar to Access’ TI technology, this allows you to integrate your Analog Rytm into a DAW as a VSTi plugin, which also works as an editor.
While this does not necessarily make your drums sound better, it will greatly increase effficiency, as you’ll be no longer forced to do some kind of configuration management to ensure that sound patch 305 is really still the same as it was when you originally worked on that song. I think everybody which has a programmable synth with USB should do this.

A limitation is that, due to USB bandwidth limits, this system lets you only have a total of eight channels at 24bit depth – which means you can have all individual outs (but no in), or another limited setup, or switch to 16bit.
Getting your hands on it
First steps
Contrary to what user manuals tend to recommend, my approach for the first encounter is different: I tend to immediately look at specific things, but that rather deeply.
Here, I cleared a pattern, selected the bass drum, and started working on a sound, adding snare and hihat as I went along. I also limited myself to analogue sounds (because, again, I have more than enough sample-based things in the computer already, and also outside of it).
I was able to settle on some convincing sounds quickly, and then, sometimes inuitively, sometimes not so much (read: I needed the full-blown manual for this), got to understand the sequencer.
I generally found that, while some things weren’t that easy to grasp right away for me, everything seemed well thought-through. A really powerful fact is that the sequencer does not only record trigger plus velocity info, put can store values of every parameter in the whole sound engine (including FX/mixer) for every step, and also glide between them.
With that feature available, it’s easily possible to combine the best of both worlds of “every beat sounds the same” drum computer feel and a very lively approach, e.g. by combining one static snare sound on the snare part with another one playing ghosts on the rimshot track which gets slight changes in the sound parameters for each hit. This also means that the inability for modulating anything except for the volume of a sound with velocity becomes less important – and if the thing is controlled from a sequencer, you can arrive at the same result using CCs.
It was also easy for me to arrive at convincing sounds rather quickly, both for your typical “ancient drum machine” flair and for something resembling more of a heavily processed acoustic drum.
The Synth
The immediate finding is that this one has a truly flexible sound engine – if what you want to do is limited to electronic drum sounds. For what we expect here, the Analog Rytm is able to both deliver the staple items of analogue drum synthesis, and stretch the boundaries with extreme settings of its engine, or recontextualizing the Machines (e.g. doing a bass drum with the FM snare Machine). There’s however a rather sharp limitation: everything which goes beyond that doesn’t work. Everything that is not drums (or rather similar to drums) is a problem, even if you include samples in the mix: doing a Prophet-style synth brass sound, something the Tempest can do and the Electribe can at least try to replicate, is not next to impossible, but impossible. This is not a problem per se – after all, someone spending in excess of a million for a Guarneri will most probably not complain that it can’t do polyphonic synth drum sounds – but I’d like to mention it.
Apart from that, this synth engine has everything it needs. The first thing I found lacking, namely complex modulation options, is not lacking at all, as you can work this with the very powerful sequencer.
The Sequencer
There’s a lot of functionalities that are simply industry standard, and are truly proven in use. Worth mentioning is that the entire organization of this thing (not only with regard to the sequencer, but it has the biggest impact here) is with a clear goal towards live use. There’s projects, which contain songs, and in each of them, the sequencer and its patterns are the important non-hierachical data containers, which also hold the patches (which they can load from and store to a library, of course).
This also means that, assuming you’ve come to terms with your instrument, you can navigate this rather blindly, muting/unmuting parts, selecting configurations and triggering sounds with the pads, and selecting patterns and changing the beat programming with the sequencers trigger button row.
So having the patterns organized in eight banks of 16, which would be rather awkward in a DAW/studio workflow, makes sense, as you can jump to another pattern in your piece with a mere two to three button presses from everywhere in the user interface, without any need to look at the display.
User Interface
All in all, I found the haptic experience somewhat unsatisfactory: the trig buttons are too far apart, and looking from an angle, the LEDs do not easily map visually to the buttons. The pads are too small, and have a definitive inferior feel compared to the Akai or DSI competition (which may very well have to do with the size).
Many of the buttons are also not nice to work with, especially those with are about 1cm wide but only ca. 3mm deep, which is double annoying because that applies to many important functions.
Workflow-wise, some things just do not work well for me, at least not yet. I have slowly come to terms with the fact that in any possible setting, I need to hold a kind of shift key plus press a pad to complete really important steps (such as selecting a part), and the drum roll function (called “Retrig”) is a nightmare – I’d like to give both the benefit of doubt and continue to try to come to terms with it.
All of the aforementioned negative items, however, don’t play any role for my usage scenario, so I won’t consider them in my final vote.
The Synth – revisited
Ok, everything above was rather vague, so I’ll try to rephrase it:
This thing sounds great!
All in All
I’ll start with the critizism, and that’s the look’n’feel, or rather the feel only: this would deserve some improvement, at least for a device in its price range. The Rolands are better. The Tempest is better, The Akais are better. I understand (and actually encourage) Elektron’s approach to try a different approach – which makes it all the more disappointing that they didn’t properly see this through.
The analogue sound engine is fantastic, and if you put together the aspects of flexibility, sound quality and usability, and finally also price, can be considered the best in the current market.
The user interface (not considering the haptic aspects) is good, and becomes intuitive after a short time, with some shortcomings. This is, however, something I didn’t consider this much for my application.
For integration, there’s two items which I’ve already critizised: one is those “two individual outs on a stereo plug” approach, which is understandable considering package considerations, the other being the use of internal sample storage rather than using a card reader. Otherwise, the combo of MIDI, DIN24/58 sync and MIDI over USB, together with the great Overbridge feature, makes this another strength of the Analog Rytm.
So, for my specific application, the Analog Rytm is the right solution: it offers by far more flexibility than the Tanzbär, and in part also than the Tempest, and that at a lower price in comparison to the Tempest. The price tag, though, is still hefty, compared to the digital competition.
So for anyone else: if analogue synthesis is not a hard requirement for you, I’d rather go with a combo of an Electribe or a TR-8 together with a Volca Beat. If it’s a specific workflow (Roland or Akai) you want to retain, then you know where to look – and if it means truly analogue plus Akai workflow, then the Tempest would be the best fit. For some very convincing staple sounds, the Tanzbär would be your choice. And finally, if what you want is a powerful analogue synth with a great drum-machine workflow, then it’s the Tempest.
If, however, you’re looking for very flexible analogue drum synthesis that shines equally with the standards and wicked creations, and want a very intuitive sequencer workflow with it, and can accept the issues in the user interface – then look no further than the Analog Rytm.

So why did the DRM-1 not make the short list?
It failed to meet the “MIDI control of sound parameters” requirement. At least that’s what I learned from the specification. Pity. Especially if you don’t care for a sequencer, this looks interesting.